Are you using mineral makeups for the first time? Wondering how to use them? Or probably, you want to make the most of your mineral makeup? Whatever your reasons are, this is the ultimate guide to mineral makeup and we will cover this in different posts.
We’ve already covered the basics in our first part. You’re probably aware that many are ditching their favorite makeup products and switching them for mineral makeup. If you’re wondering how dusting powder can help, you’re sure to learn a lot about them!
The best thing about mineral makeup is that – it is among the few makeup products that can be counted as good for skin! It is natural and the application is easy and works really well. The best part – you don’t get breakouts using them, if anything, it combats acne and your skin is pampered with the minerals infused in them.
You can wear them everyday, or reserve them for special days. Irrespective of how you use it, you can look your best without looking pasted or covered with loads of makeup that make you look artificial.
Cleanse!
Most important thing to remember – always make sure cleanliness isn’t compromised. By using unclean hands or makeup tools like brushes, you can increase the change of bacterial infestation – a key trigger for acne. So always use clean tools and hands – to apply makeup, or remove them form their containers, etc.
Another important thing is to cleanse your skin before applying makeup. There’s a reason artists want a clean canvas for their art, and makeup is similar to art in a lot of ways. Cleanse your skin before applying makeup and make sure you exfoliate at regular intervals. If you exfoliate right before makeup, wait for a bit before sprucing your skin up.
Moisturize
Moisturizer is an important part of your routine. Don’t forget it. Also it keeps dryness at bay and you could avoid a blotchy makeup – thanks to moisturization that keeps dry skin patches at bay. So, apply your moisturizer on your face and neck and wait for 5 – 10 minutes before you apply makeup. This helps with penetration of moisture.
Concealer
Now, it is time to cover up blemishes or spots or just get an even base to work with. Here’s where you use a concealer. If you are looking to cover blemishes, dark circles, spots, redness, etc. – you will appropriate concealers or correctors. Once you apply it where needed, blend thoroughly. Using a sponge or concealer brush is ideal for this step.
Foundation
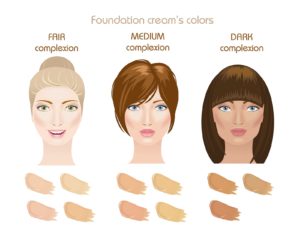
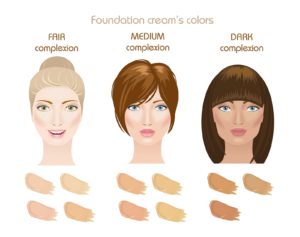
Now, it is time for foundation. Since the concealer and correctors can be of a different shade and only applied on problematic areas, we need a foundation to even out, cover the colors and get a good finish. Apply the foundation and any other makeup after that and tidy up!
Eye Make-Up
Eye Makeup comes after the concealer and foundation are applied. It is a good idea to use a moisturizer or serum for eyes, as they need special attention.
Lip and Cheeks
Now, it is time for Lipstick / Gloss, Lip Liner, or whatever Lip Makeup you plan to use. Follow-up that with the Cheek Makeup – Highlighter, Bronzer, Blush, etc.
When you’re all done, use a setting spray or powder to set your Makeup. Done. However, the post or tutorial isn’t over yet! Stay tuned for more ☺
Love this post? Keep us posted with the same. We love to hear from our readers and your comments and suggestions are always welcome. Have you tried Gaya Cosmetics, yet? Let us know if you like their mineral makeup products.

