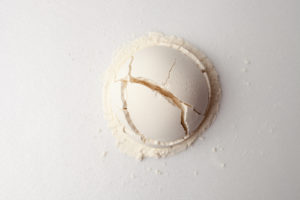
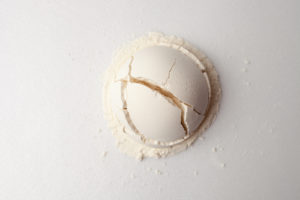
Mineral Veil is a light face powder that is used to set makeup, but I love that it is a light and easy way to spruce myself up real quick!
I like to use a mineral veil more often than any makeup and I often just use a mineral veil when heading out. As someone who’s not a fan of makeup more often, I prefer going light and easy on my makeup. This fits my bill right for that purpose, or when I want my makeup to last on the days I wear them, this comes in handy as my setting powder 😉
There are different ways to prepare mineral veil, though I am going for the exhaustive and comprehensive version as I use this a lot. We will add more simpler and easier options soon ☺ I promise!
Ingredients
Sericite Mica – 1 Tbsp.
Magnesium Stearate – 1 Gm.
Silk Peptide – ½ Tsp.
Arrowroot Powder – 2 Tsp.
Fuller’s Earth – 1 Tsp.
Argan Oil – ½ Tsp.
Lavender EO – 5 Drops
Yellow Iron Oxide – a pinch
Brown Iron Oxide – a pinch or two
Green Iron Oxide – a teensy tiny pinch
Instructions
In a mixing bowl, add all the dry ingredients and blend them mechanically using a spatula for a few minutes.
If you have a spice grinder or a coffee grinder, use that to get an even and fine mixture of the dry ingredients.
Now, add the oils to this mixture and blend well.
Transfer to a sterilized jar.
Done!
Tips to Tweak the Recipe
If you don’t get Silk Peptide powder, try Bamboo Extract Powder – it is fine and silky. It hydrates your skin and keeps it radiant.
Instead of iron oxides, you can also use other suitable alternatives like Spirulina powder, beetroot powder, rose powder, cocoa powder, turmeric powder, etc. If you want to bring down the mineral content, or want cheaper and suitable alternatives, these are your choices. Just go with your skin tone and work around that to get the measurements right – do a patch test on the inner arm to get the right shade.
Red, Yellow, Brown and Green Oxides – as needed for your skin tone. I did not add Red Iron Oxide, as I did not need it for my skin. I did a patch test to get the ratio and shade right. Start by adding teensy tiny pinch and go based on what you need after patch test. The first time around, I used the other dry ingredients, then added the color pigments one after the other, doing patch tests as I went along with each to get the shade right. You can do that way too – though it is a little exhaustive, doing it like that the first time helps.
As for the clay, you can use any clay – Fuller’s Earth worked for my skin tone better. Kaolin Clay works for light or pale skin tone and Moroccan Red Clay might work for darker skin tone. Rhassoul Clay, Australian Red Reef Clay, Black Clay are other options you can try. You can also opt for other facial clays like Pink Clay, based on your taste, preference and skin tone.
If you don’t want to use Arrowroot Powder, Corn Starch, Tapioca Starch or even Rice Powder works. You can also skip starch powder if you don’t want your powder to be translucent or use white clay instead.
For those who have sensitive skin, it is a good idea to swap Magnesium Stearate with Boron Nitride – silk powder. This eliminates the problem of clogging pores – which Magnesium Stearate does for those with very sensitive skin. One of my friends who has sensitive skin made this suggestion to me after some research.
How to Apply the Powder?
I find using Kabuki Brush works best for applying or brushing this powder on.
Don’t have time for DIY Mineral Makeup? Try Gaya Cosmetics for pure, organic and hypoallergenic mineral makeup. Keep us posted with your results and successful tweaks, as always.

